Moving on to Mountain Lion from Snow Leopard was probably the best thing I could have done for my early 2009 White Macbook. I have been using it to program for over 4 years now and I could not have been happier with it. It might only have 4 GB of RAM and a 2.13 ghz Core 2 Duo but it still runs like a beast. The only downside was I was running out of hard drive space and in result the crippling OS performance. If you want to see some tips to making your Mountain Lion install feel like the previous versions, skip ahead to the bottom.
Getting a new hard drive
First thing I did was buy a new 1TB Samsung Spinpoint M8. Replacing the old 120GB hard drive has been long overdue. It was between the Samsung, a 7200RPM 750GB Seagate Momentus, or a WD 7200RPM 750GB Scropio Black. After looking at some reviews on stroragereview, I was convinced the extra 250GB and longer battery life was worth the Samsung M8. Skip ahead a couple days and I got the Samsung installed in my Macbook.
Upgrading to Mountain Lion
The only thing stopping me from upgrading in the past, was the amount of space left on my hard drive. So with almost unlimited space left, the next logical step was to upgrade to Mountain Lion. Before buying my copy, I put in my laptop serial number here (to see if it is a supported model) and compared it to the minimum requirements for installing Mountain Lion here. Looks like I met the requirements. Now I fired up the app store, found the Mountain Lion update and let it fire.
Three things I didn’t like about Mountain Lion
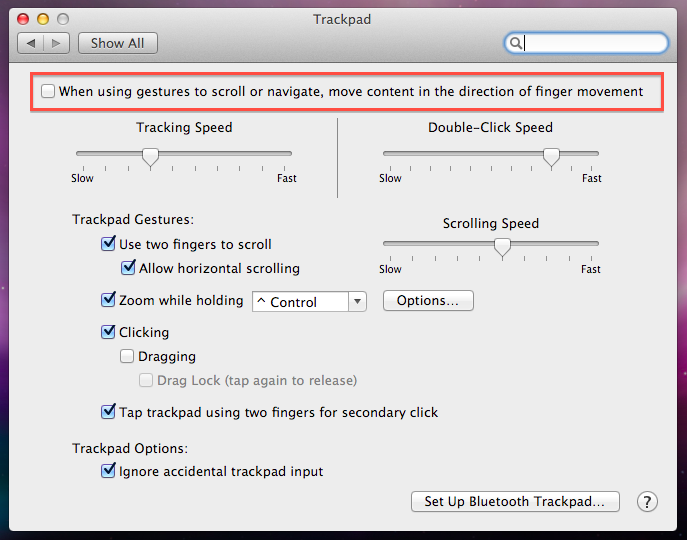
1. Reversed Scrolling
The scrolling is reversed to make it feel like natural iPhone and iPad scrolling. To fix this, go to System Preferences > Trackpad/Mouse, and uncheck the ‘When using gestures to scroll or navigate, move content…’. Reversed scrolling begone!
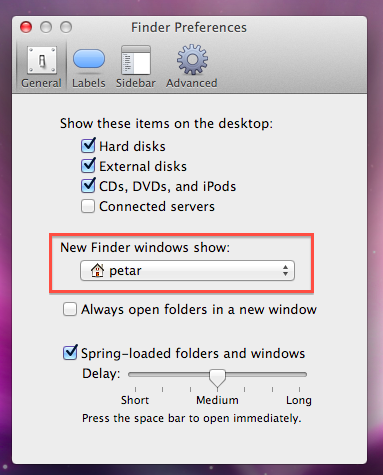
2. New Finder window opens up ‘All My Files’
Again something new for me in Mountain Lion. This new ‘All My Files’ takes a long time to load and lags the finder. Just like in the Snow Leopard I like to have it open up to a custom folder. You can do so by going to Finder > Preferences (CMD + ,). Then under ‘New Finder Window show’ change it to your liking.
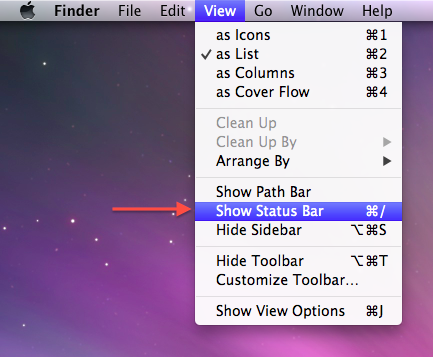
3. Drive Status in Finder
Every drive use to have a status at the bottom of the Finder window. The status included the number of items and size remaining of the drive. It is incredibly when using external USB devices so you can see how many more items you can cram on the device before you run out of space. This can be fixed easily. Once you have Finder open, go to View > Show Status Bar (or press CMD + /)